This article explains how to set your viewing times, manage tenant requests, and review confirmed viewings in your dashboard.
Here's a quick guide on how it works:
1. Set Your Availability
Before tenants can request a viewing, you’ll need to set when you’re available:
- Go to the Property Overview tab
- Navigate to the section entitled 'Set Your Viewing Availability'
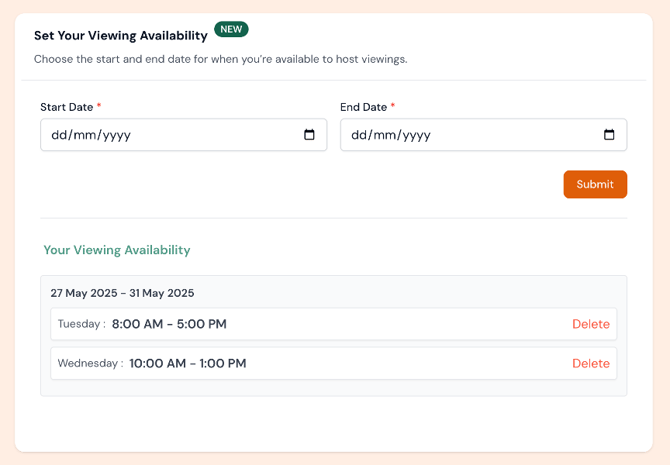
- Select a date range (e.g. 27/05/2025 – 31/05/2025)
- Add available time slots for each day (e.g. Tuesday: 08:00–17:00)
- Click Submit to make times visible to tenants
- You can remove slots at any time.

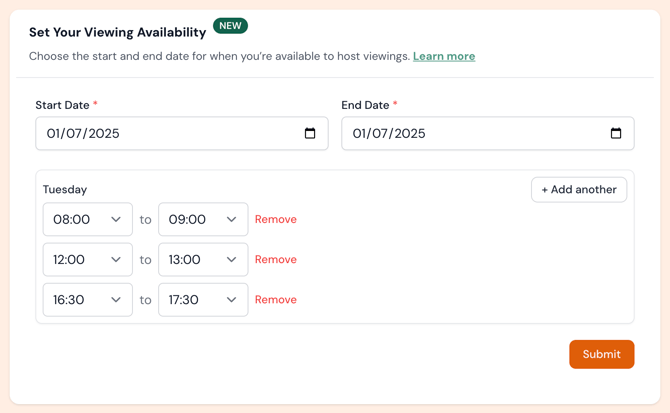
💡 Setting multiple availability slots on the same day
If you’d like to offer more than one viewing slot in a single day, you can do that easily:
-
Select your Start Date and End Date (e.g. 29/05/2025)
-
Click + Add to enter your first time slot — for example, 08:00 to 09:00
-
To add another slot later in the day, click + Add another and enter the new time — such as 16:30 to 17:30
-
Click Submit to save your availability
Once submitted, you will notice your availability schedule below:
2. Tenant Viewing Slot Process
Once availability is set:
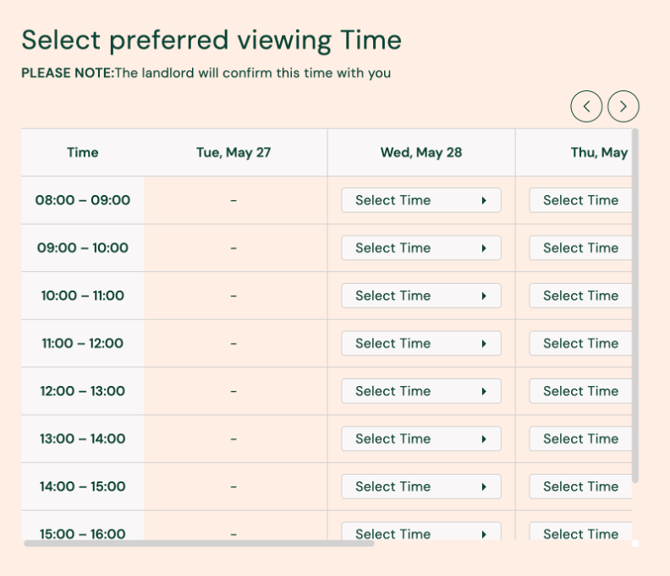
- Tenants can view available time slots and choose a preferred time
- Viewing times are organised in 15-minute blocks
- They’ll see a message: “The landlord will confirm this time with you”
- The system highlights their selected time with a green tick
Example – Tenant selecting a Viewing Slot:
3. Reviewing a Viewing Slot
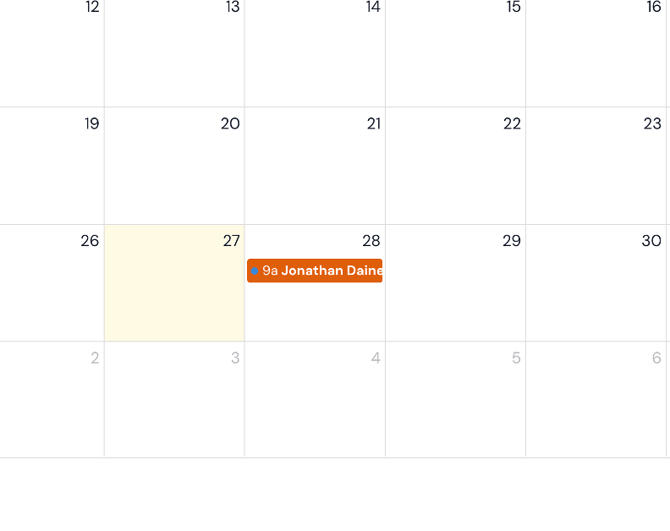
You’ll receive a notification when a tenant requests a viewing.
- To review the request:
- Open the Calendar or List view
- Click the viewing label (e.g. “9am Jonathan Daines”)
- A pop-up shows the Renter Profile with:
- Contact info
- Traits (e.g. Employed: No, Smoker: No)
- Income and affordability checks
Example:
You can click on the event and open the details of the enquiry where you'll be able to confirm or decline the request.
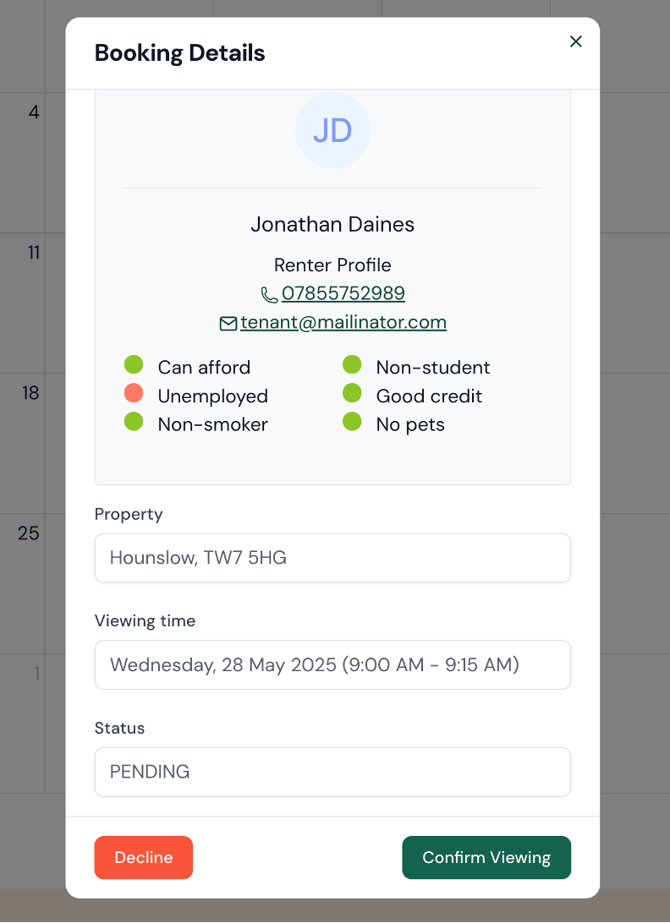
4. Confirm or Decline the Viewing
Within the viewing details screen:
- Click Confirm Viewing to approve
- Click Decline if it doesn’t work
- The calendar colour updates automatically:
Green = Confirmed
Orange = Pending
Red text = Declined
5. Track Viewings and Feedback
Use the List view to:
- View all upcoming viewings in one place
- Check tenant info at a glance
- Track statuses and gather feedback
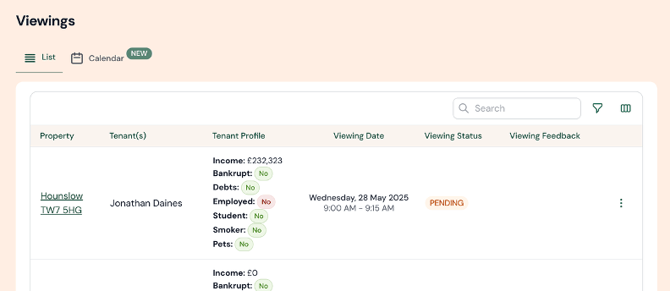
Viewings List
After the viewing time has passed, the system will automatically request feedback from the tenant. Any responses will appear in your dashboard.
Tips
- Always review income, credit, and employment status before confirming
- Keep your availability current to prevent overlapping requests
- Use Calendar View for a quick overview of your week
Need help? Contact our support team.